Tutorials | Long Exposures with no Filters. Part 1, Introduction
It sounds great, no shelling out on expensive filters but still doing long exposures. "How?" I hear you ask. Well it's simple.
The method involves taking multiple exposures of your subject over the amount of time you want the long exposure to be for while controlling the delay between the exposures. You then blend the images together using magical fairy dust* in your image processing software of choice. The result is that all your frames will be "averaged" together, with the elements which have moved between frames nicely blurred just like in a normal long exposure. As a special bonus you also get stunning low noise in the final image - this is especially useful if your camera is prone to noise when doing multi-minute exposures. It's also useful if your camera has a fixed maximum exposure time.
*Not really.
How image averaging compares with long exposure using filters
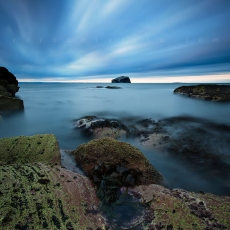
The next two thumbnails are a direct comparison between using a B+W 110 ND 10 stop filter and 16x 12 second exposures blended using the image averaging technique. Differences in colour are purely down to post processing - I've attempted to make the white balance look as close as possible - the 10 stop filter I use has a tendency to warm the image a lot.
Now if you're flicking between them and thinking "???? there's no difference!" then o/ IA has done it's job. :) However one of them should look a little noisier with noticeable hotspots. That's obviously the traditional LE. At 100% the IA version is amazingly clean!
- The image averaged photo is is a series of 16 frames, each exposed for 12 seconds with a 3 second gap making a grand total of 4m 06s long exposure equivalent.
- The long exposure using the ten stop filter is made of 2 exposures - one 8 minutes for the foreground and the other, 4 minutes for the sky.
The nice thing about the image averaging technique in this case is there is no problems with the hot pixels you can see in the long exposure. Also image averaged photographs have VERY low noise - noise is random and image averaging averages out the differences between frames while leaving anything static alone!
Another bonus for me here was because I used my graduated filters in the Image Averaged shots I was able to expose correctly for the foreground and sky in a single frame. With my screw on 10 stop filter, using the graduated filters is so fiddly and time consuming it's simply not worth the hassle. So in that case I simply shot two exposures. This resulted in the time taken for the image averaged shot being a third less than the 10 stop!
Er... You've got filters, so why in all that's wiggly are you using this technique?
There's a number of reasons why you might want to use this technique: -
- With this technique, I get to choose how long to expose for.
- If I decide I don't like how the image comes out as a long exposure, I've still got a pile of individual shorter exposure frames I can choose from. I can select just a single frame or use fewer of the frames to create a shorter "long" exposure - if you see what I mean.
- My camera suffers from hot pixel hell when I use the 10 stop filter for any length of time - usually more than 2 minutes. Image averaging means this is a non-issue.
- The noise is much MUCH lower in a image averaged shot. MUCH lower!
- Using graduated ND filters with my B+W 110 ND is nigh on impossible - especially at sunset/sunrise. I can't see through the viewfinder to tell if the grad ND is in the right place. With image averaging this is a non issue.
Tutorials | Long Exposures with no Filters. Part 1, Introduction
Tutorials | Long Exposures with no Filters. Part 2, In The Field
Tutorials | Long Exposures with no Filters. Part 3, Back At Base
Tutorials | Long Exposures with no Filters. Part 4, Sample Images
Tutorials | Long Exposures with no Filters. Part 5, Links


